Showing posts with label braids. Show all posts

Saturday, July 27, 2013

Twisted-Rope-Updo Tutorial

Hello there!
In my last post I've showed you how to do a twisted rope Braid. And today I want to share with you a tutorial which based on this braid.
I wear this updo on a festival from my little sister and got a lot of compliments for this updo, because it looks a bit difficult to do BUT IT ISN'T !!! (:   


This hairstyle of Amanda Seyfried, which she wore on an awards night, inspired me to do this updo.
The Updo I want to show you, does not look exactly like Amanda's Updo but it's quiet close to her's ^^


So if you're interested in how to do this updo the keep on reading !!! n_n

What you need:
-Hairbrush
- Hairspray/foam
- some elastics
- some bobby pins


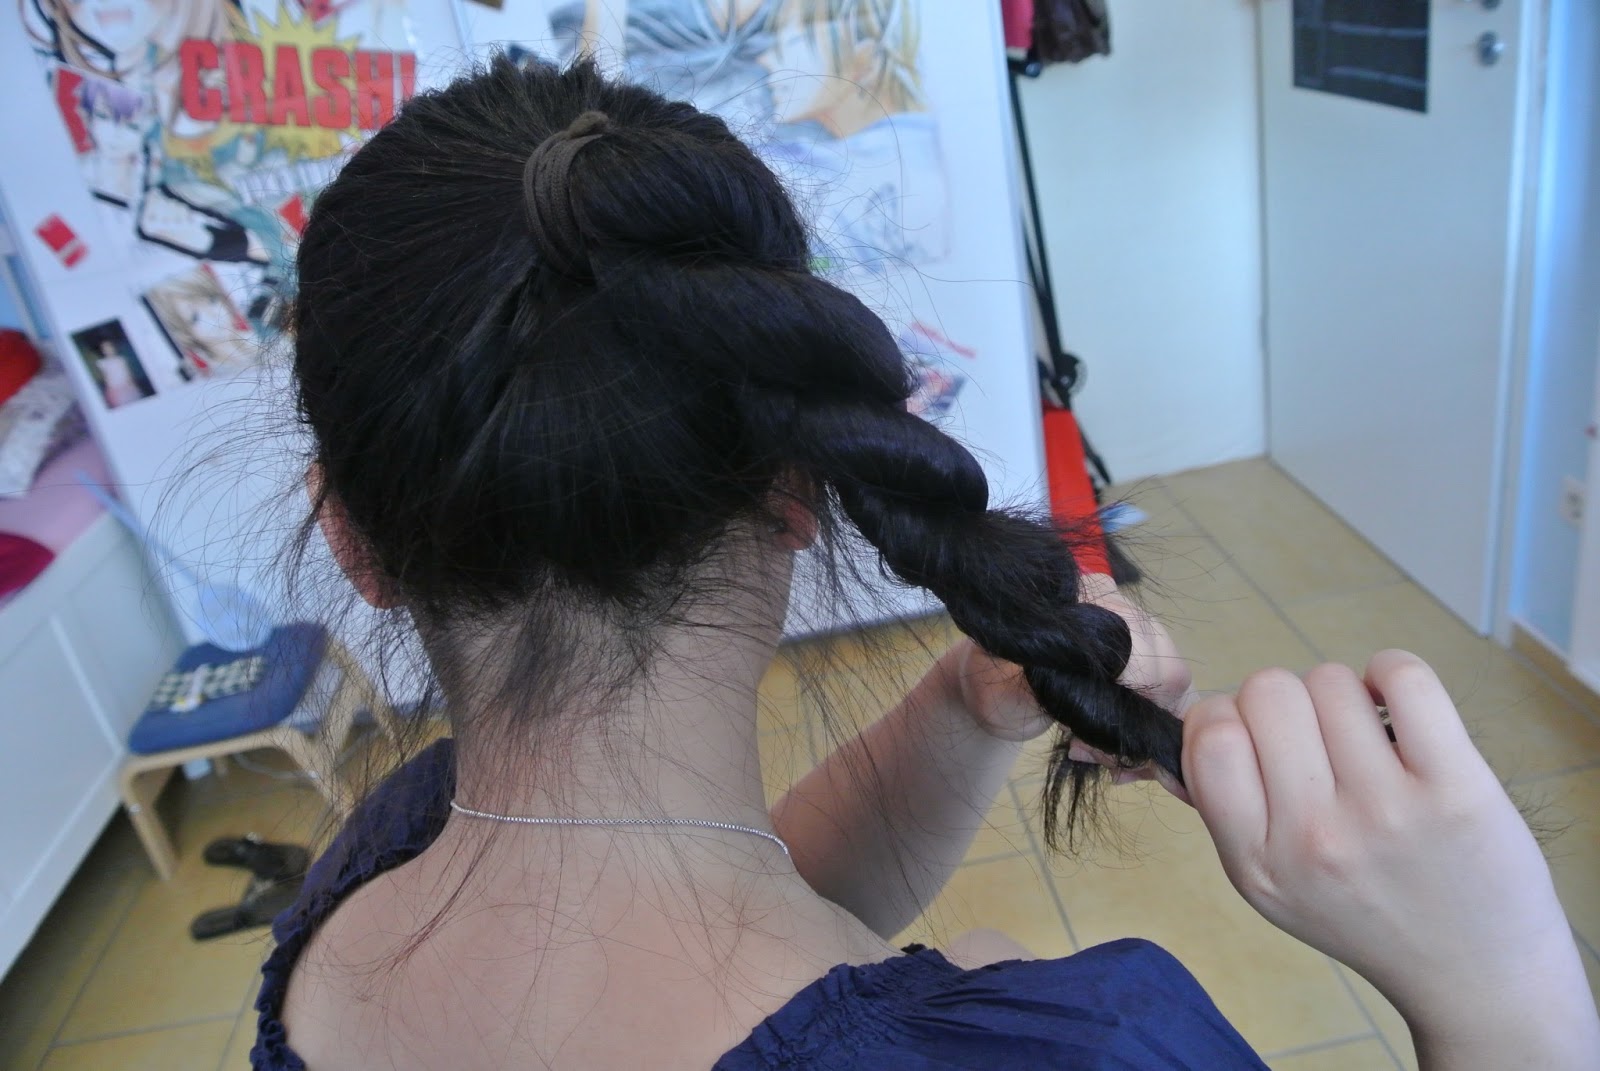
1. Brush your hair and make sure that there any             knots. Then put a little bit of hair foam on your         hair to make them easier for you to grab. After         all preparations are done part your hair to a               middle parting (I hope you now what I mean             :s).Now braid both side of your hair to a                   twisted rope braid.(To see how to do the                 "Twisted-Rope-Braid"  click [here]

2. Knot the two braids together and let the endings               hanging out.


   In the next step you've got two opinions how to               continue with this updo ( I'll show both) ^^
3.1 (Choice A)
      Take some bobby pins and secure the endings         of the two braids behind the actual "braid" and         hide them so that you can't see any hair tips or           the elastics after that.
      
      The final result of this choice is seen in the 
      last two pictures. :3

 3.2 (Choice B)
       Take the two endings and cross them over.
       Secure the endings with a few bobby pins on the side of your head,          were you cross the endings over....

       
       ...Unfortunately I forgot to take a final picture of choice B.
          But when I have to describe it the Updo looks like a little 
          swirl. You may see a bit of it in the second picture of choice B :s 


FINAL RESULT:
As already mention this is the result of choice A 
So after all work it should look like this. ^~^


Side view ---------------------------->


....Well this was my tutorial for the "Twisted-Rope-Updo". I think this Updo looks very elegant and chic but you can also wear it on festivals or garden parties.This hairstyle is also good for the hot summer months 'cause you have no hairs in your neck which is really refreshing..hehe...

Thanks for reading my tutorial I hope you enjoyed it and maybe looking forward to my next post !!! <3

                                                                  ~momo-nhi~ 

Saturday, July 20, 2013

Fancy Twist Rope Braid Tutorial ^~^

Hello everyone ! <3
It's been quiet a long time since I posted something and I'm very sorry for it. Furthermore I'm also just at the very beginning of my existence of beeing a "Braid-Blogger" but...well...I was on vacation and was a bit (too) busy with some kind of stuffs :3 but nevermind I've already prepared the following tutorial but because of my clumsiness I always forgot to post it..hehe.. but FINALLY here it comes  ^^ enjoy <3


So this tutorial is about (what a wonder XDD) how to do this very elegant, fancy and unique twist rope braid.
It's very easy 'cause you only have to handle with 2 strands and it's always a more creative alternative to an usually high ponytail, and moreover lots of beautiful and supposed to be complicated updos are based on this braid.

Let's start ^-^

What you need:
-Hairbrush
-2x Elastics
- eventually hairspray and bobbypins


1. Brush your hair and tie all of your hair to
   an high ponytail up.

 2. Divide the ponytail into 2 equal strands and grab      them.


3. Now take the strands and twist each of them in         the clockwise (right) direction.
 4. As you had twist the two strands                             CLOCKWISE, you now have to twist the               strands in the COUNTERCLOCKWISE 
    direction (left) together 'till you reach the end of         the braid and secure it with an elastic.


 And then you're done! :3 The finished braid should look like this! 


Final advises: - make sure to twist the strands very tight (together) so that you get a clear "rope-Braid"
                     - If you have any flyaway hair ( like me in the pictures) you can hide them by using bobby pins                        to secure them on your head.
                     - To make the braid last very long you can prepare your hair with some hair foam first before                         braiding or spray some Hairspray on it as a finish.
                     - I wouldn't recommend this braid for girls with very gradually hairs 'cause you will get lots of                          little hang out tips out of your braid, which doesn't look very nice.. :s  


So yeah.... this was my second hair tutorial (YAAY) I hope you enjoyed it and maybe looking forward to my next posts!!! (/^o^)/  

                                                         ~Momo-nhi~ 

Tuesday, June 4, 2013

Snake-Braid Tutorial <3

Hello there!
Today I would like to show how to pimp a regular three strands braid into a cute and unique 
( I don't know the original name) Snake-Braid...
It's pretty easy and fast and it's good for everyone how like to do braids but aren't patient enough. ^-^

So if you're interested in this tutorial keep reading!!! (/^-^)/   

what you need are:
- a hair brush
- a hairband
- some bobby pins (to secure your braid later)

1. 
   First brush your hair to make sure that there are any knots.
   then grab some hair from the top of your head and divided
   into three equal sections. Then you wanna go ahead and do 
   a regular three strands braid. Make sure to make your braid 
   very tight so that you won't get many fly away hairs at the
   end. Braid your hair until you reach the end
   (leave ca. 5 cm  of the your braid open) .  ^^


 2.
    Then to transform the braid into a snake-braid divided the
    end of your braid into three strands.
    I 've give them the numbers 1. left strand, 2. middle strand
    and 3. right strand to explain it to you easier. <3 
3.
   In this part you hold the 2. strand  (middle) into one hand and
   grab the other strands (1. and 2.) into the other hand and push
   them to one side. 
4.
    Now came the funny part. you take the 1. and 2.
   strand, which you have into on hand and slide them 
   up, while holding the middle strand down.
   When you push the strand all the way up then you should
   have this weird hair muddle like in the picture. 
5.
   Then you wanna pull this muddle down and spread them apart.
   At this  point you're closely done with this braid.
   When you are satisfied with your work take a elastic band and
   tie the braid in place.


 This is just a idea how to wear this braid :
 So take your braid and secure it with some
 bobby pins on the back of your head.
 It looks cute and romantically and is very fast
 and easy to do.
 I myself do this braid often and get lots of
 compliments on it even it's just a unspectacular
 three strand braid. ^-^  


  =) this was my first hair tutorial on blogger... I hope you had enjoy reading it and maybe look
     forward to my next post... =)  
                                                         momo-nhi